DIY Automatic Headlights
Introduction
Letting sleeping dogs lie on a 20-year-old car sounds like the ideal choice. But, a base-trim antique as senior as mine lacks many commonplace (at least, today) features. Most notably? Automatic headlights. I could’ve just swapped in an upgraded module and have my onboard computer reprogrammed, but I wanted to see the inner workings of the circuitry.
Understanding the Original Circuit
The first step in the process was understanding the wires I needed to tap into to keep myself safe while including a backup switch. Because wiring diagrams were not readily available, I used a multimeter to understand which pinouts were closed during different lighting states.
Choosing Components
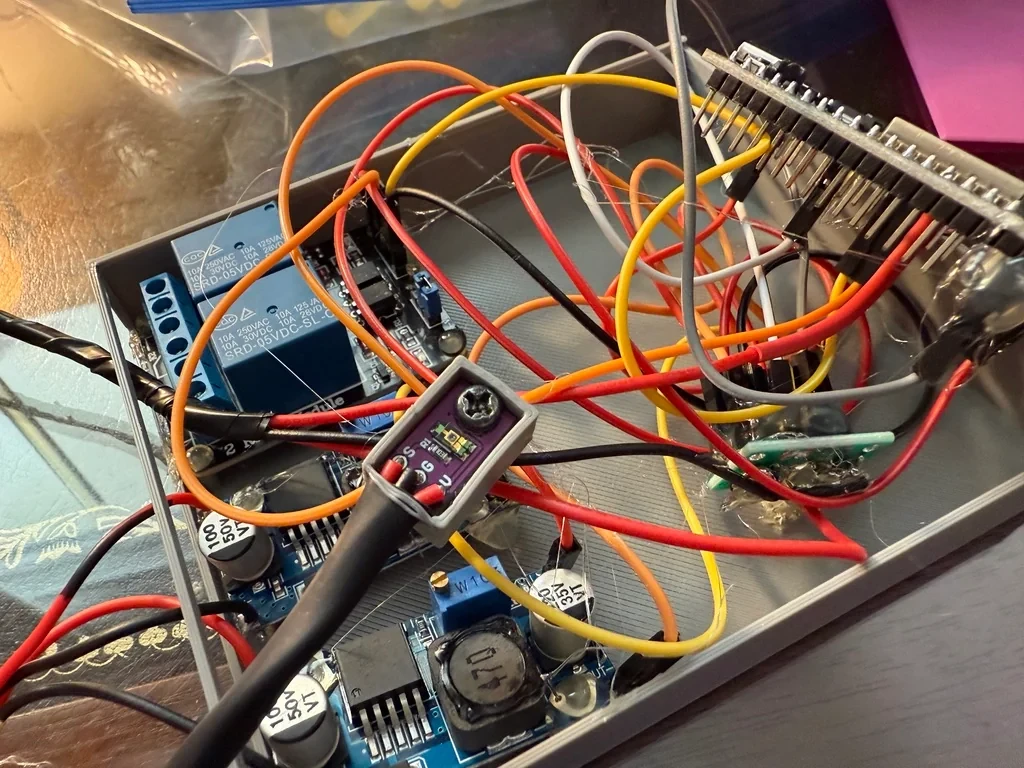
Once I had a rough understanding of the wiring, I proceeded to the next step: devising a suitable strategy to integrate a microcontroller using onboard power. I chose an ESP32, as per usual, due to its conveniences: widespread availability, cheap to buy and replace, and (although not applicable to this project) wireless connectivity. I bought a pack of two car starter relays, not knowing that the ESP32 was unable to deliver the required voltage. Thankfully, I stumbled across an old electronics kit that had a 5-volt dual-relay board, one for the headlamps and one for the parking lamps. Included in my order were TEMT6000 ambient light sensors, which provide more consistent and accurate readings than typical photoresistors.
Debounce and Margin Logic
Ready to begin programming, I plugged in the semi-soldered circuit together. I began with a simple conditional loop: if the sensor reads above a certain threshold, turn both relays off, and vice versa. Taking my contraption for a drive, I realized that the range of the TEMT6000 was offset too high to capture the threshold where I wanted the lights to switch on. I quickly fixed this by 3D printing a small enclosure to hold the light sensor and covered the top with Sharpie-covered tape.
With the threshold correctly identified, I needed to implement margin and debounce conditionals to allow variance around the threshold and prevent rapid flickering, respectively. The debounce was set to five seconds, coincidentally meaning that the lights would turn on for five seconds on startup. The limited range of the light sensor required a fairly large margin, considering the output was being read with a resolution of eight bits (0-255):
// thresholds
const int threshold = 136; // threshold value
// margins
const int marginOn = 20; // smaller margin for ON (darker)
const int marginOff = 56; // larger margin for OFF (brighter)
const int upperThreshold = threshold + marginOff; // upper threshold margin, OFF
const int lowerThreshold = threshold - marginOn; // lower threshold margin, ON
The next step was to get stable power. Ideally, resistors would have provided power to the circuit; unfortunately, both the power draw and the voltage from the car’s battery fluctuated, so I bought a pack of LM2596 buck converters. The ESP32 chip itself runs on 3.3V, although 5V can be provided as input through its built-in voltage regulator. In the interest of avoiding stress on the regulator, I used two buck converters to step the car’s 12+ volts down to both 5V and 3.3V. Letting the circuit run for two hours in the heat and adding a backup switch was assurance enough that it would be within an acceptable margin of safety. Additionally, the wiring needed some level of protection, coming in the form of a rather shoddy 3D printed case and plenty of hot glue to dampen the vibrations (especially for the relays).
Then came the most difficult part of the project: splicing together the old and the new. Making sure to fully disconnect the car’s battery, I tensely troubleshooted the Frankenstein-esque circuit. After the power, relays, microcontroller, and manual switch were all wired together, I connected the battery cables to the terminals and started the old girl up, lights sparking to life.
The biggest thing some may have taken away from a project like this would be that it was wholly unnecessary—just use the switch. I took away something much more important: a new understanding.